Skill Level
Beginner
Time to Make
1 hour + drying time for paint + glue
Adult Supervision Needed
Yes
How to Make
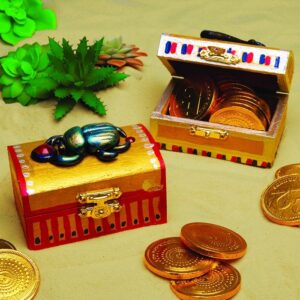
- To make the beetle’s body, cut off 1cm from the side of a 5cm half polystyrene ball.To make the head, cut a 4cm half ball across the middle. Glue the 2 pieces together and leave to dry. The balls can be cut with scissors, or with a craft knife (adult). When the glue has dried, paint the beetle blue or green, or use a mix of bright colours.
- Brush metallic paint over the inside of a secret keepsake box. Leave to dry, close the box then paint the outside. Leave the box to dry before turning it over to paint the back.
- Cut out a pair of wings and a head for the beetle from blue card, the glue the pieces to the underside of the beetle’s body. Cut out a circle (3-4cm diameter) from red metallic card for the sun.
- When the paint has dried on the beetle and the box, place the beetle in the middle of the lid. Lightly mark around the beetle shape in pencil then remove it from the box. Use the pencil outline as a guide for painting the legs with a thin brush. Check the legs at the top are positioned to hold the shiny red circle.
- Glue the beetle on the lid of the box on top of the painted legs. Paint 2 eyes, details on the wings and stripes or patterns on the body using a thin brush. Glue the shiny circle onto the box between the beetle’s legs.
- For printing the border design, pour some metallic colours into a mixing tray or saucer. Cut small strips of thick card, dip into the paint then press around the edge of the box, using a separate card strip for each colour. Leave to dry.


Top Tip
For the border, strips cut from a cardboard box are the ideal size for printing stripes. The strips can also be pressed onto the box at an angle to print diagonals or triangles. Lightly rule a pencil line around the edge of the box as a guide for printing.
Template
DownloadTagged with: