Skill Level
Intermediate - Adult Supervision Required
Time to Make
30-45 Minutes
Adult Supervision Needed
Yes
How to Make
- Practice your half-hitch knot with 2 spare threads tied together and secured on a surface with some tape. To make a half-hitch knot, use your left hand to pinch the thread on the right at the top. Place it over the left thread while keeping its end to the right. This will make the shape of a 4. Use your right hand to take the end of the thread behind the other one, transfer it to your left hand and take it through the loop you created. Then transfer it to your right hand and pull it towards the right while holding the other string steady with your left. When you feel confident with this knot move on to the next step.
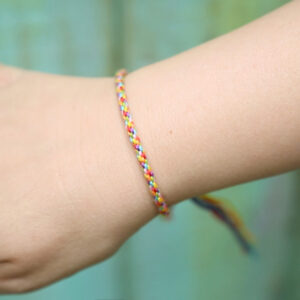
- Choose two colours of wool and a button. Cut a piece of each colour wool 180cms long. Then gather the wool threads at one end and fold them in half so you have four threads to work with. Make a loop at the folded point, and pass the button through to indicate where you will need to place a knot. Tie your knot in place and use some sticky tape to attach your knot and loop to a work surface.
- Arrange the wool threads with two of colour ‘A’ in the middle and colour ‘B’ on the outsides.
- Now that you know how to make the knot, start by making 1 row of double half-hitch knots in colour ‘B’. Your right thread will now be a colour ‘A’. Make 2 rows of colour ‘A’ and then another in colour ‘B’.
- Thread a pony bead onto the middle 2 wool threads. Continue by repeating the pattern in step 4, then threading a pony bead, until you have the length of bracelet you desire. This can be somewhere between 16 and 22cms, so it is best to measure your wrist first. If you don’t have a tape measure, wrap a piece of wool around your wrist, mark or cut it and then measure that with a ruler.
- When you have finished the length of the bracelet, gather the threads together and tie a knot. Take your button and thread it on with a few pieces of the wool (wet the ends and roll between your fingers to make the wool easier to thread). Pull the button up tightly against the knot, then gather the threads together again and tie them in another knot behind the button. Trim to leave a 1-2cm tail.
- Fasten the bracelet by pushing the button through the loop at the other end.
Top Tip
Practice your half- hitch knots on some spare thread (step 1) before beginning your bracelet.