Skill Level
Beginner
Time to Make
1-2 hours + baking and cooling time for clay
Adult Supervision Needed
Yes
How to Make
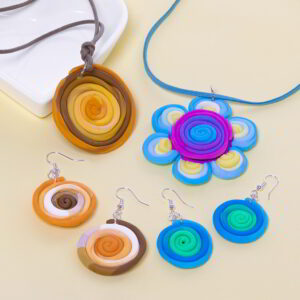
- Flatten ½ a block of red clay with a roller to make a 6cm x 6cm square. Repeat with orange, yellow, green, turquoise, blue and pink, or use different colours if you prefer. Pull out the corners on each piece with your fingers so each piece is roughly the same size.
- Stack all the colours together into a sandwich in a rainbow sequence. Press the layers together with your fingers then flatten on top with a roller to make the stack about 8mm deep.
- Trim off the uneven the edges with a blade or knife to make a neat square shape. Save the offcuts to re-use.
- Roll up the clay into a tight spiral then trim off a slice from the end to check the size of the pattern. To make a smaller swirl, roll the clay with your fingers to reduce the diameter of the cane. Slice off 5mm sections from the cane, press them together then flatten them with a roller.
Note: For the best results, cut the cane with a blade designed for polymer clay. If you use a craft knife, always cut straight down through the clay in one movement so the blade doesn’t drag. Craft knifes with longer blades are easier for cutting canes.


Top Tip
To reduce the scale of a pattern, keep rolling the cane to make it thinner before cutting the slices. Cut the cane in half if it gets too long as you roll it. Save any left over slices or end pieces from canes to re-use.