Skill Level
Beginner. Adult supervision needed
Time to Make
1.5 hours
Adult Supervision Needed
Yes
How to Make
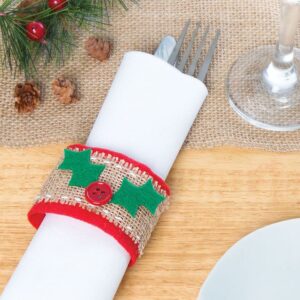
- Cut a sheet of red felt in half through the centre to create two pieces measuring 7.5cm x 22cm – place one aside to for the backing.
- Create a button border by arranging a selection of red, white and green buttons around the outer edge of the felt strip and securing in place. Accent each of the button faces with a dab of glitter using the PicTixx pens and set aside to dry.
- From the dark green felt cut out two holly leaves. From the light green felt cut two thin curved strips that will form the centre stems. Remove the backing from the light green felt and secure one to the centre of each of the holly leaves.
- Arrange the two holly leaves in the centre of the strip of felt with the button border and, once happy with the position of the motif, remove the backing and secure the front of the felt strip.
- Arrange three red self-adhesive buttons on top of the motif to form the holly berries. Once happy with the placement, remove the backing and secure into place.
- Create the ties by working with the unembellished strip of felt and removing the backing paper. Cut two 53cm lengths of coloured seagrass and position them 2cm from the top and bottom of the felt strip, with 15cm of ties either side of the strip. Tie a small knot in each of the four ends of seagrass.
- Remove the backing paper from the embellished felt strip and carefully position in place over the backing sandwiching the ties in the centre and securing. Pass the seagrass ties around a mug or cup and tie in two bows to secure.


Top Tip
Apply a thin layer of glitter when accenting the buttons, this will dry quicker and create an even sparkle, add a second coat as needed.