
Skill Level
Beginner. Adult supervision needed
Time to Make
1 hour
Adult Supervision Needed
Yes
How to Make
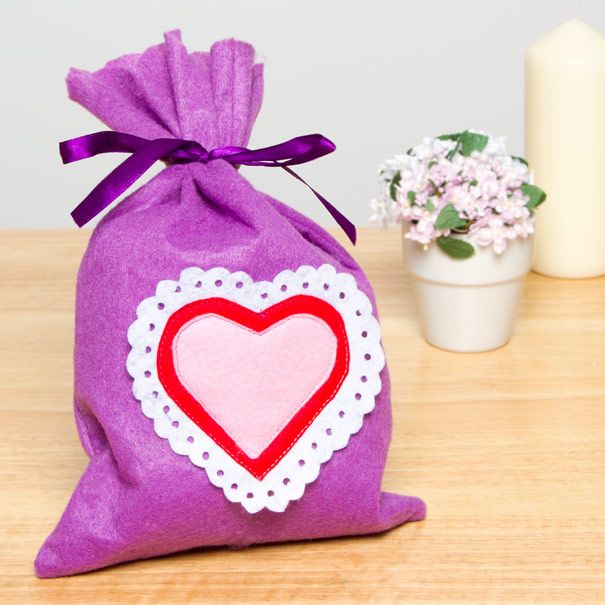
- Using the templates provided cut the following pieces: the small heart from pink felt, the large heart from red felt and the lace heart from white felt.
- Create the lace edging detail by working around the outer edge of the lace heart using the hole punch to make a small hole in each of the scallops.
- Place the lace heart centrally onto the lower front of a sheet of purple felt 4 cm from the bottom. Place the red heart on top and pin in place. Take a needle and thread and use a running stitch, working carefully around the outer edge of the heart to secure the two layers onto the purple felt (use a sewing machine if this is easier).
- Place the pink heart centrally onto the red heart and pin in place. Stitch as above.
- Place the two purple felt sheets with right (outer) sides together (the applique will be inside) and use a running stitch to join the two side seams and the lower seam to form the bag. Clip the seam allowance at the corners and turn through to the right side.
- Place a piece of ribbon centrally onto the back of the bag, 5 cm from the upper edge and pin in place. Use a running stitch to carefully secure the centre 4 cm of the ribbon to the back section of the bag only. Be careful not to stitch through both layers of the bag.
- Use scissors to neatly trim the top of the bag to create curved scallops. Bring the ribbons around to the front and tie in a bow to finish.


Top Tip
You can use a dab of glue to hold the pieces of felt in place if you would rather not sew with pins!
Template
DownloadTagged with:
Birthday, Felt & Fabric, Felt & Fabric Design, Home, Mother's Day, Stitching, Valentine's Day, Wedding