Skill Level
Beginner
Time to Make
1.5 hours + drying time for dye
How to Make
- Before you start:
-
Cut 2 x 25cm x 25cm squares from an old pillowcase or sheet, or use 2 cotton handkerchiefs.
Rinse both pieces of fabric then squeeze out most of the water until it is damp.
This will help the dye colours to spread through the folds. -
Fold the fabric in half.
Fold it in half again making 4 equal square sections.
Starting with one corner, fold the fabric diagonally with a 1cm pleat, turn the fabric over then repeat. Continue pleating and turning until the fabric is folded into a concertina strip.
Tightly wrap elastic bands around the folded fabric at regular intervals.
Repeat with the second piece of fabric to make a matching pattern. -
Fold the fabric in half.
Fold it in half again making 4 equal sections.
Fold the fabric diagonally in half to make a triangle shape. Fold it diagonally in half again, and then again to make a pointed, thin triangle shape.
Tightly wrap elastic bands around the folded fabric at regular intervals, starting near the thin point of the triangle. The thin end will be the centre of the circle pattern.
Repeat with the second piece of fabric to make a matching pattern. -
Wear the disposable gloves in the kit then follow the instructions for adding water to the dye bottle and applying it onto both pieces of fabric.
Squeeze the dye over the tied fabric. Press and roll the fabric so the dye reaches the middle folds.Leave the tied fabric pieces to dry for 6-8 hours hanging over a bowl with newspaper or paper towel underneath.
Remove all the elastic bands (with gloves on) then open out the fabric. If it still feels very wet, remove any excess dye with paper towel or leave it to dry for a bit longer.Rinse the fabric in water then leave to fully dry. Cover it with a pressing cloth then iron out the creases.
-
Stick double-sided tape strips onto both sections of a craft box. Stick strips along the edges and top of the lid and around the sides and base on the box.
To cover the lid, trim one of the dyed fabric squares to 15cm x 15cm.
Peel off the tape backing strips then carefully press the fabric over the top and sides of the lid. Smooth any creases or crinkles with your fingers then turn the lid over.
Stick 4 double-sided tape strips inside the lid around the edges. Peel off the backing then neatly press the fabric on top. Pull the fabric as tightly as possible. If the fabric bunches up in the corners, carefully trim off the excess so the lid will fit onto the lower section of the box.Peel off the tape backing strips on the base of the box. Carefully press the box in the middle of the second dyed fabric square. Cut away a square shape from the corners of the fabric on all 4 sides, using the edges of the box as a guide, so the fabric makes a cross shape. Peel off the tape backing strips on the sides of the box then neatly press the fabric on top. Pull the fabric as tightly as possible. Smooth any creases or crinkles with your fingers.
Cut 2 pieces of self-adhesive felt (6.5cm x 10cm) to fit inside the lid then stick them in place so they overlap.
Cut 2 pieces of self-adhesive felt (6.5cm x 13cm) to fit inside the box then stick them in place so they overlap.Glue a wooden flower as decoration onto the box lid.
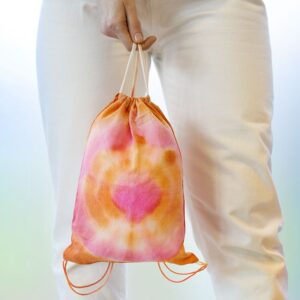
To make a diagonal cross pattern:
To make a radiating circle pattern:
To dye the fabric:
To cover a box:


Top Tip
Trimmings and offcuts from dyed fabric can be used to make little cards or tags. Wooden decorations can be coloured with the fabric dye.